Setting permissions in Power Apps using Security Roles
Table of contents
Introduction
Firstly, this post is all about checking if a user has a security role. If you'd like to check what access they have to a data source, please use the DataSourceInfo function.
I've seen enough articles and videos to know that lots of people are researching how to toggle visibility based on security and being told to write something like this in the Visibility property of a control:
User().Email = "myemail@example.com"Let's say that this bit of code is to check whether the logged in user is an admin. Whilst this will work, what do you do if the admin changes? Would you change their email address? Then you need to search throughout your app and replace all of those references, but be careful because you might have referenced the email address for another use case.
It can get more complicated than that. Let's say you need to add an additional admin. Then you need to check for either email address. As you can see, it's not an elegant implementation.
A better concept
Power Apps provides us with Security Roles in order to manage our security needs. We can create a security role and then set the visibility of controls in our app based on that role.
This article assumes that you know how to create a Security Role. If you don't, please see here for creating a security role.
Assigning Security Roles
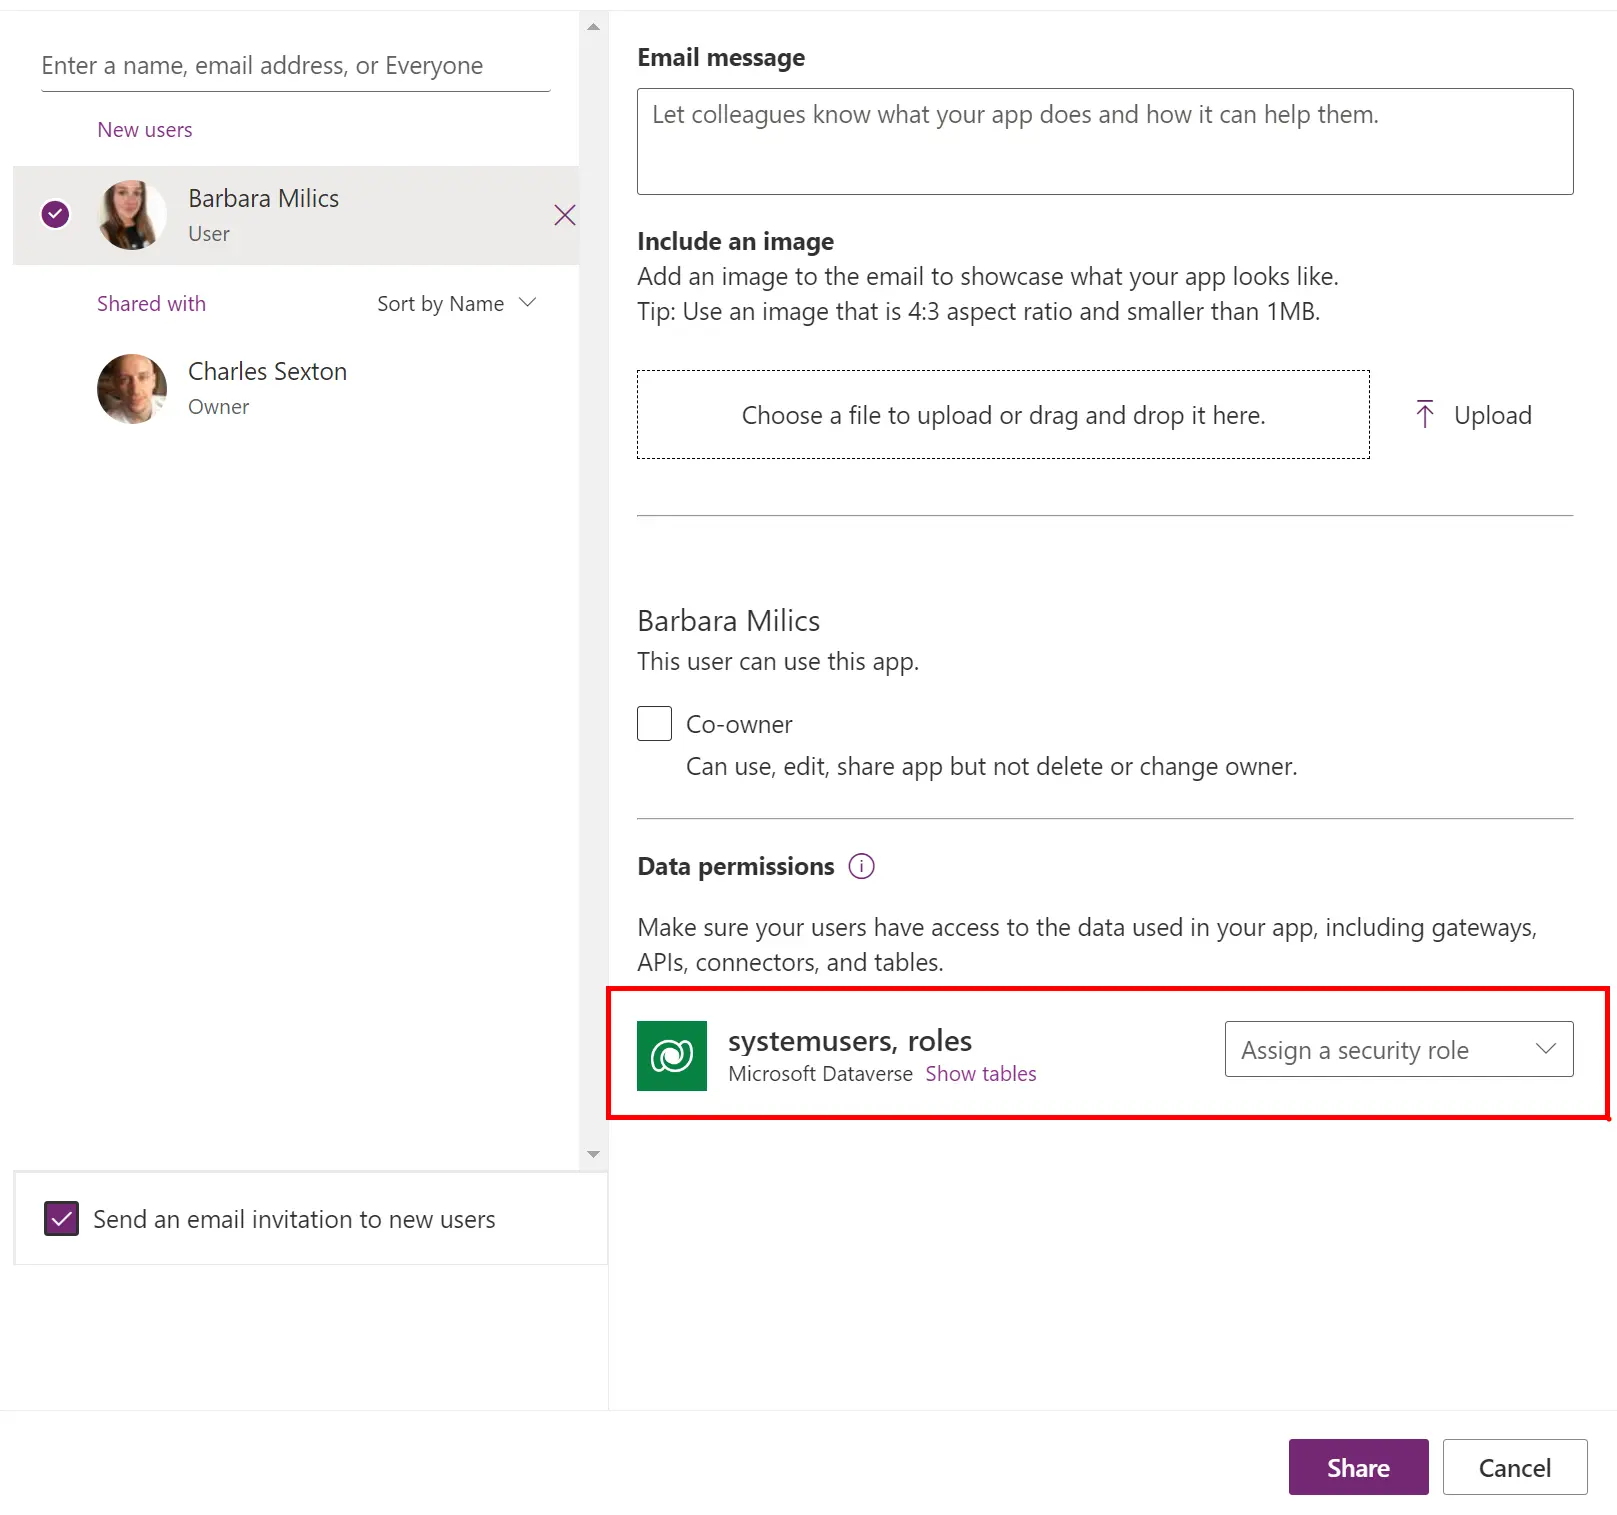
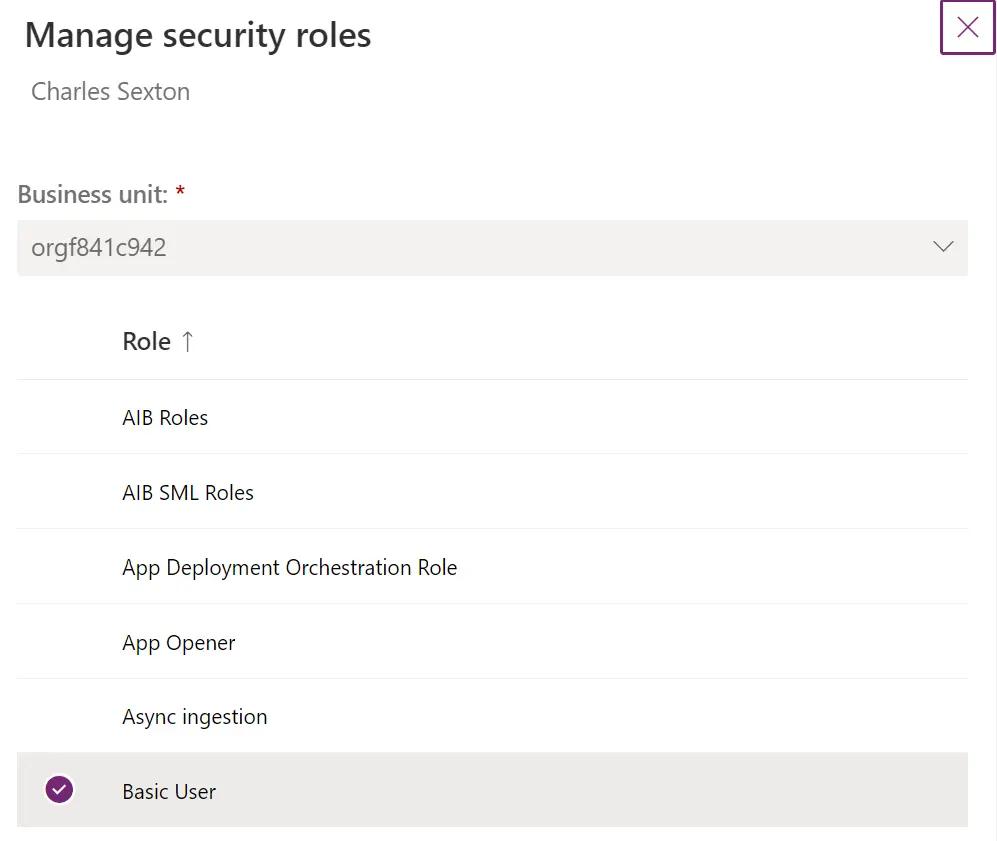
When you share your app with someone, you get the option to assign security roles to them, like so:
Alternatively, you can set the Security Roles in the Power Platform Admin Center.
Dataverse
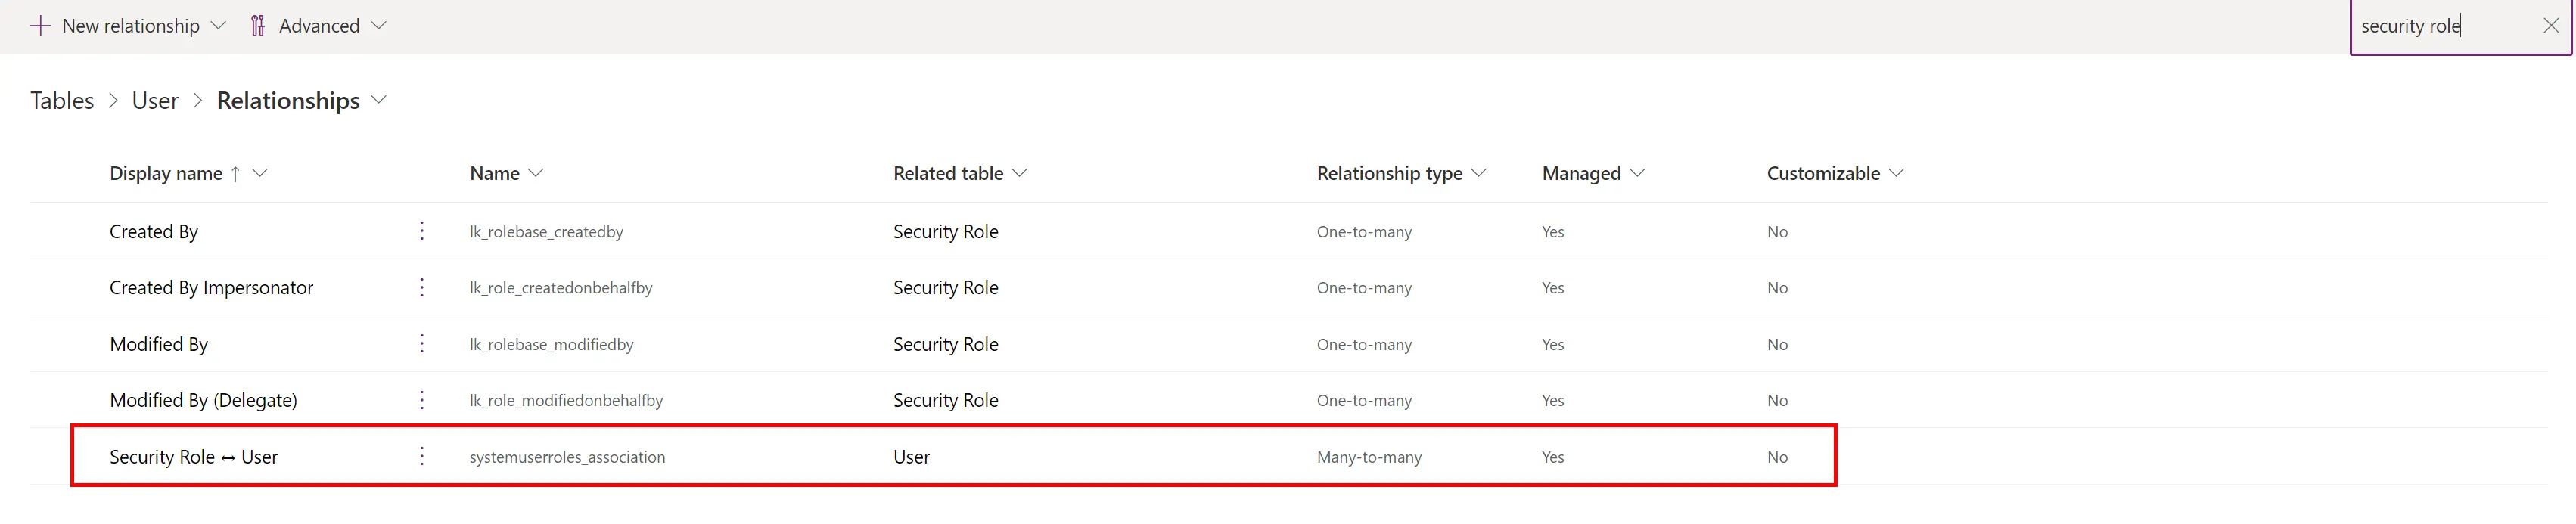
When you assign Security Roles they are stored in a Dataverse table. We can't see this data by default in Dataverse, but we can see that the relationship exists between the tables. The reason why we can't view the data is because it's a many-to-many relationship, so it's stored in an intersect table. You can read more about it here: Create many-to-many table relationships overview
Getting a user's Security Roles
Now that we know where the information is stored, we can interrogate those tables to get a user's Security Roles. Let's move over to our Power Apps Canvas App and start writing code.
LookUp(Users, 'Azure AD Object ID' = User().EntraObjectId)We're performing a LookUp (to get one record) on the Users Dataverse table. We're filtering that looking by the Azure AD Object ID column, which holds each user's Entra ID, and we're comparing that to the logged in user's Entra ID.
This LookUp returns the User's record from the User table, but what we actually want are the Security Roles, so let's grab that LookUp column.
LookUp(Users, 'Azure AD Object ID' = User().EntraObjectId).'Security Roles (systemuserroles_association)'Now we've got the Security Roles, but we're returning them as entire records, when we only really need the names. For performance reasons we should just extract (show) the name column. Here's our final code:
ShowColumns(
LookUp(Users, 'Azure AD Object ID' = User().EntraObjectId).'Security Roles (systemuserroles_association)',
"name"
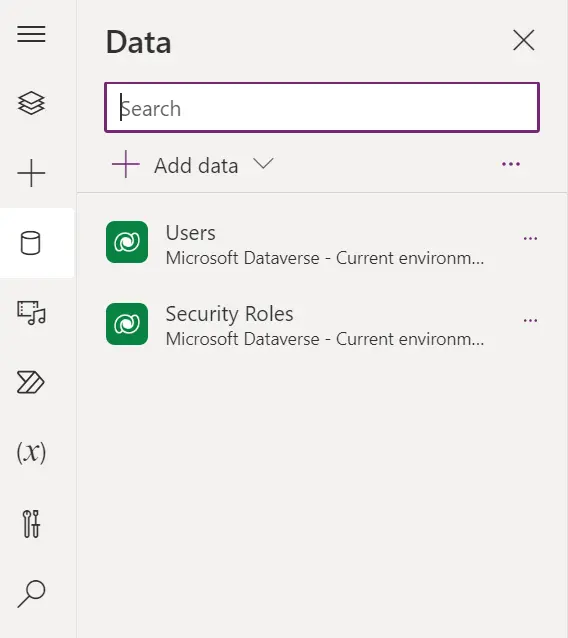
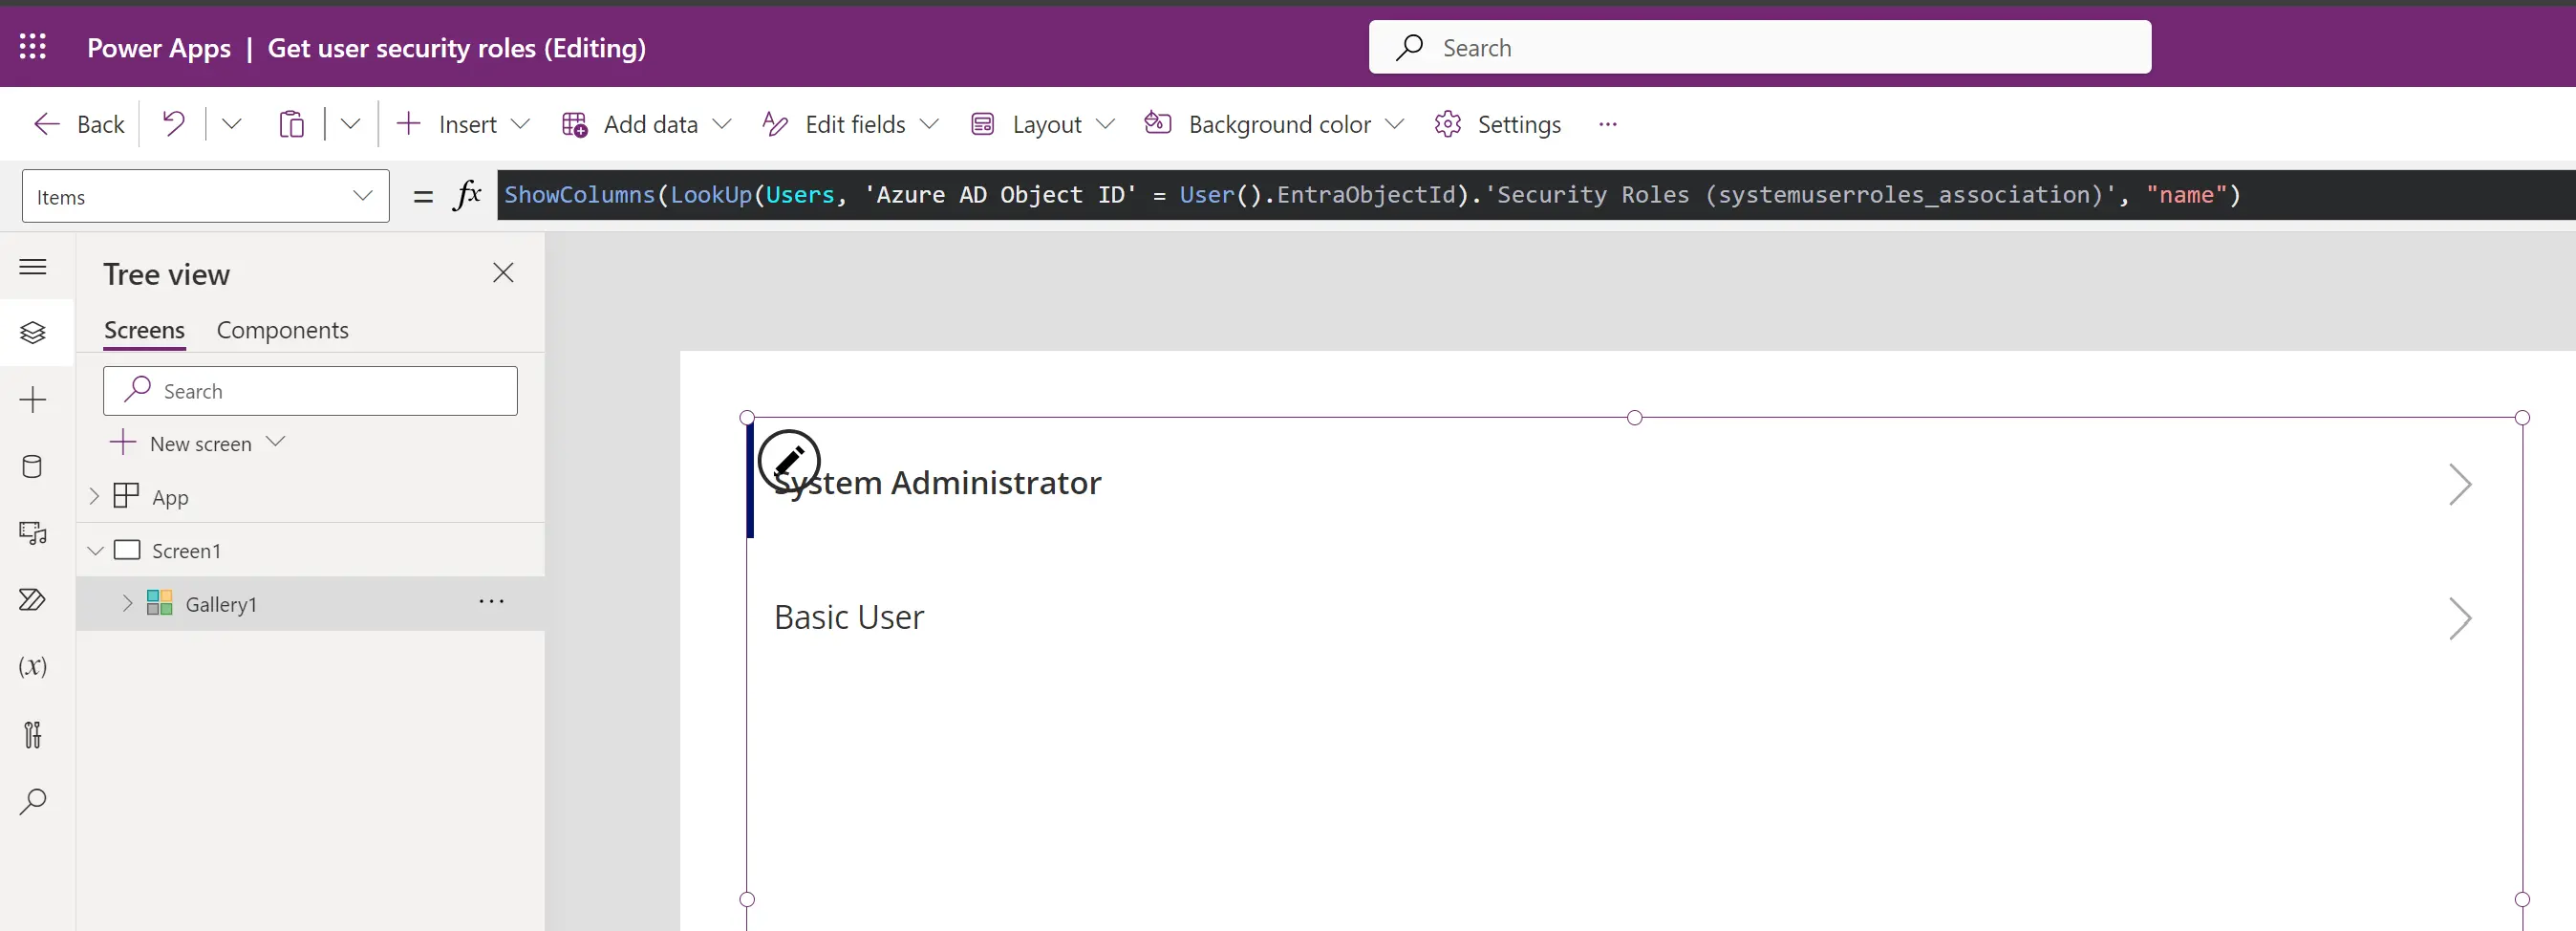
)In our app, let's make sure we've got the Users and Security Roles tables added as data sources.
This is what it looks like if we add our aforementioned code to the Items property of a gallery in Power Apps.
Best Practices for storing reusable code
We're going to want to reference the user's roles many times throughout our app, so we need to store this information as a global variable, or collection.
In the past a Power Apps developer would have created a collection in the OnStart property of the App. However, we now have a better way of handling use cases like this.
We will store this code in the Formulas property of the App. Variables that are stored here are only run when they need to be processed, so it can offer a huge improvement in performance over the OnStart method.
I prefix my formulas with "frm" to ensure the names don't conflict with anything else in the app and to immediately recognise what they are when viewing code across the app.
Please note that every formula is required to be closed with a semi-colon.
frmUserRoles = ShowColumns(LookUp(Users, 'Azure AD Object ID' = User().EntraObjectId).'Security Roles (systemuserroles_association)', "name");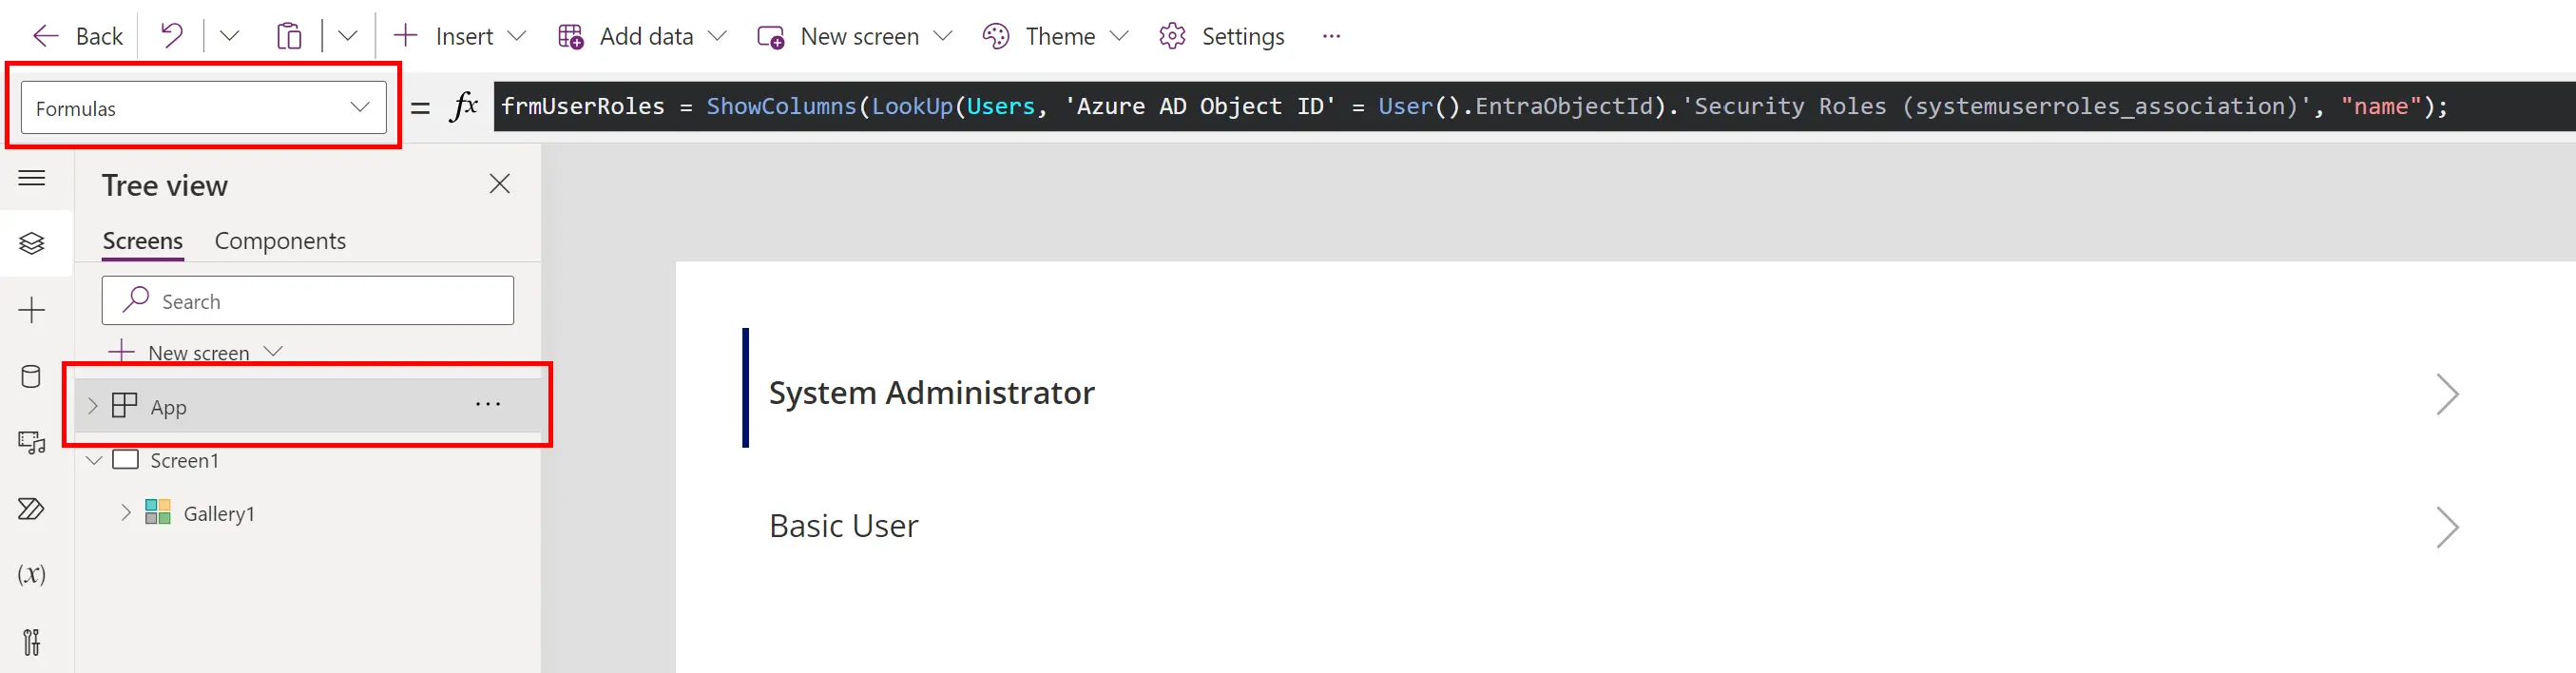
Toggling visibility based on a user's security role
Now we've gone through all of that, we can finally do what we set out to do, hide something if someone shouldn't be allowed to see it!
Let's set up two buttons. With the first one, we're only going to show it if the user is a System Administrator. I am one, so I'm able to see it.
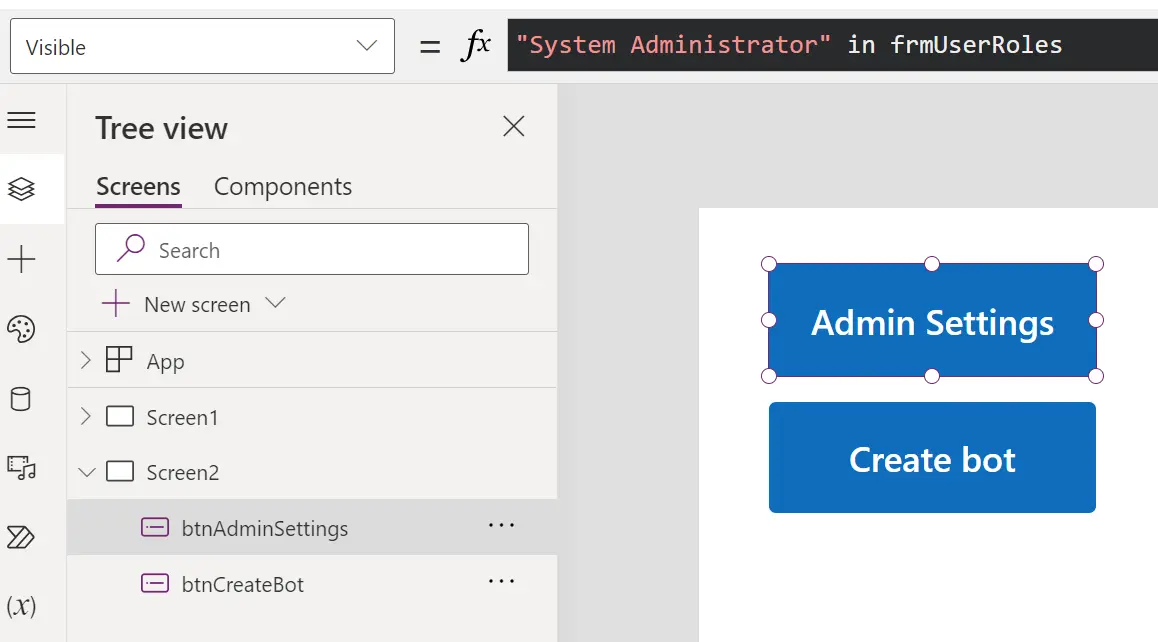
And look at how clean that code is. 😍
"System Administrator" in frmUserRolesWe can do the same thing with the second button, but this time we're going to choose a security role I don't have. As you can see below, this button is not visible to me due to that.
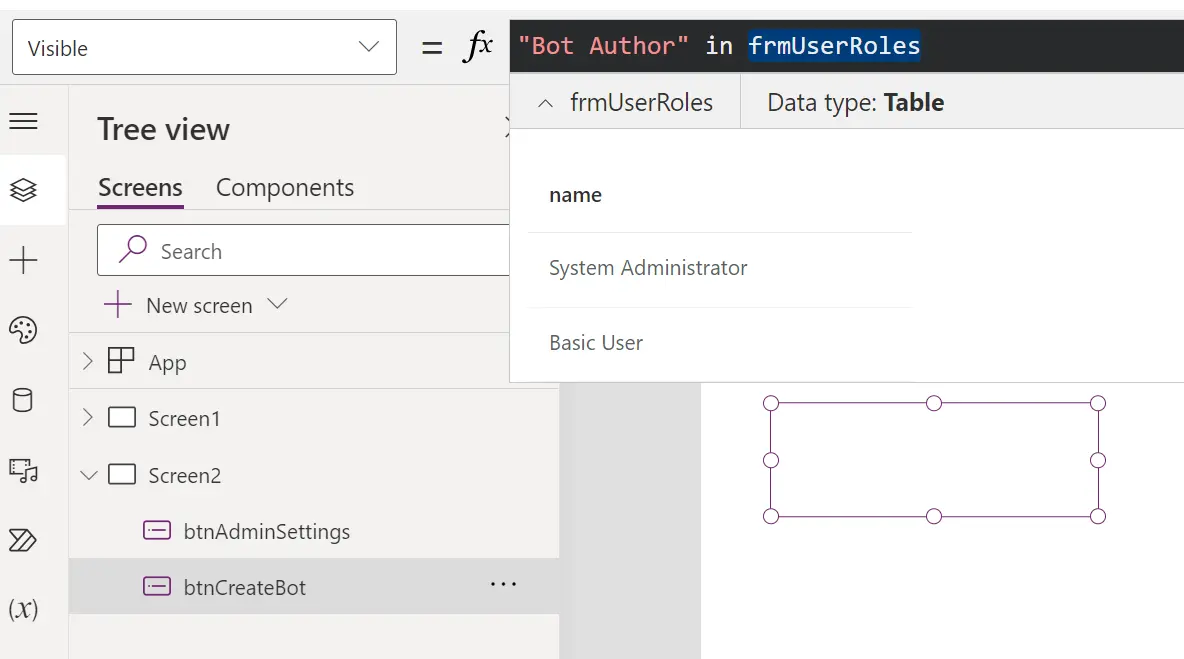
In addition, I'm highlighting the frmUserRoles variable in the formula bar, so that you can see what it contains.
Next steps
Huh? Next steps? Yes! In part 2 I show you how to incorporate Security Roles assigned to your security groups into this, because currently it's not checking for Security Roles you have inherited from them.
Comments